You might have noticed that your Wi-Fi antennas are detachable. If the antenna has a problem, you can just replace it with another one. However, making a Wi-Fi antenna with your household items is also possible. So, how to make a Wi-Fi antenna to get free internet?
You need to get a paper clip first and straighten it. Cut an 18mm ink tube and a 19mm wire. Bend the wire at 90 degrees and insert it into the tube. Use the lighter to heat the tube side and make a tight fit. Use electrical tape to improve the signal. Insert in the port and check the connection.
It’s also possible to get free internet using the directional antenna. But you would need to arrange a lot of kits.
Is It Possible To Get Free Internet With An Antenna?
You can easily connect your devices like computers, mobile, and tablets to the internet with the help of Wi-Fi, and you won’t need any cables. The router’s antenna plays a vital role in the mechanism. It sends the wireless signal to the devices within its range.
To catch or receive the signal, you must have Wi-Fi-enabled devices. Those devices have a particular component named a wireless adapter to receive the signals.
If there’s trouble with your router’s antenna or your device’s wireless adapter, you can’t access the internet despite having the password. Therefore, it’s possible to get free internet with an antenna.
Presently, Wi-Fi dominates among users as a way to access the internet. You can use Wi-Fi at home, Office, in restaurants, in coffee shops, etc. Most public places offer internet to the customers like Barnes and Noble bookstore.
Make A Wi-Fi Antenna To Get Free Internet
Wi-Fi antenna is troubling, and you have a rush to get online? Well, don’t worry because you can replace the Wi-Fi antenna with your household items and use the internet for the time being. Here’s how you can do that:
First Method: Use A Paperclip
In the first method, you can use nearby home tools to make an antenna for your router. Here’s what to do:
Step 1: Arrange The Required Materials
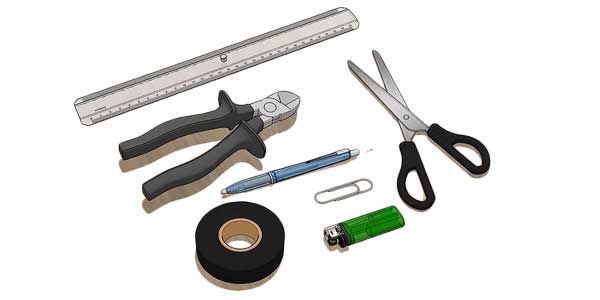
To start the process, you need to gather all the necessary materials. So, arrange a large paper clip which should be at least 2-3 inches, a roll of electric tape, an empty ballpoint pen, a lighter, wire cutters, and a metric ruler.
Make sure you keep all the tools beside you, or it will take extra time to bring them one by one. As a result, you would need to stay offline longer.
Step 2: Get The Paper Clip
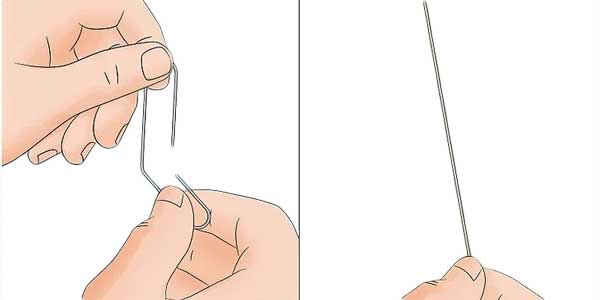
Now take the paper clip and try to unfold it gently. Make it a straight piece of metal. Handle the clips gently, or they will bend unnaturally and fail to serve their purpose.
Step 3: Cut The Paper Clip
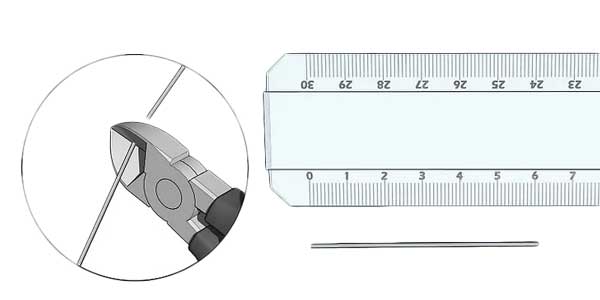
You need a more oversized paper clip to get the best signal. Therefore, 2.4 inches or 61mm long wire should be perfect. So, measure the straight paper and cut it to the proper size. It would be best if you tried to get a precise cut to have the most effective antenna.
Step 4: Bend
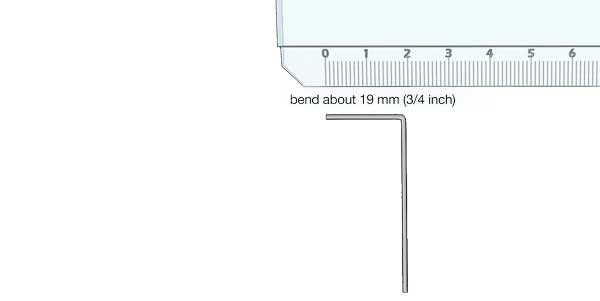
Again, measure 3 to 4 inches (19mm) from one of your straightened paper clip wire’s ends and bend it at a 90-degree angle. This small part will go inside the Wi-Fi antenna port. So, you should get the exact size.
Step 5: Get The Ink Cartridge
It would be ideal to use an empty ballpoint pen to get the tube, or else things might get messy. Get the tube out of the pen and remove the ink cartridge. Cut about ½ to ¾ inches or 12 to 18mm tube. It would be best to cut the part when it’s used to contain ink. Be careful while cutting the tube if there’s ink in it.
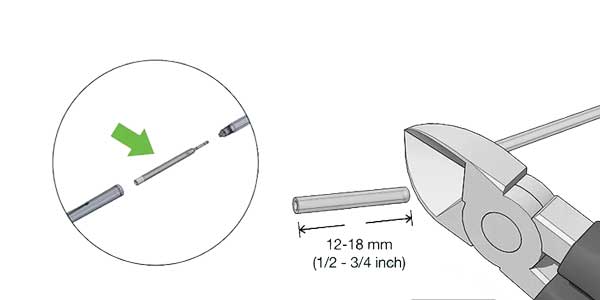
Step 6: Slip The Tube
Now it’s time to insert the small bend part of the clip into the cut-off piece of the ink tube. You need to ensure a 1.5 mm or 1/16 inches extended part of the slight bend.
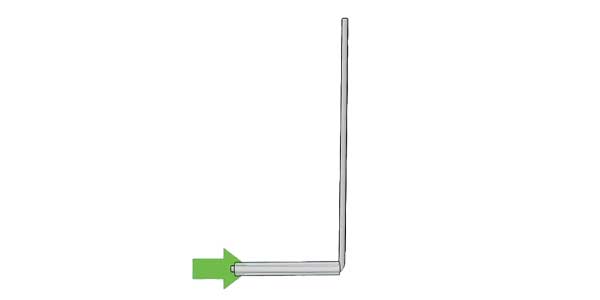
Step 7: Shrink The Tube
After that, get the lighter and start the fire. Place the lighter under the tube of the paper clip. Now heat the tubing gently on the paper clip. The heat source lighter will have enough power to melt the tube. But gentle heating will shrink and fit with the paper clip. Make sure you heat all the parts properly to make a tight fit.

Step 8: Insulate Your Antenna
Now wrap the whole paper clip along with the tube part properly with the electrical tape. It will help to get a smooth signal and prevent excessive interference with the signal.
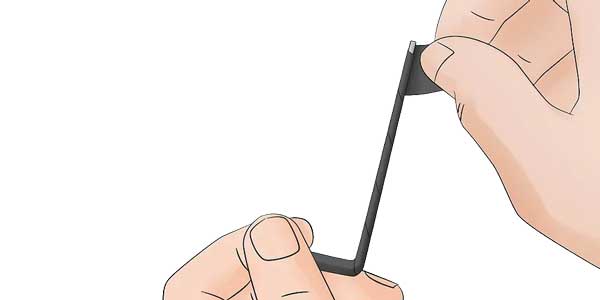
Step 9: Insert
Lastly, you need to insert the tubing part of the paper clip into the Wi-Fi antenna port. Make sure the paper clip and connector pin are pressed together in the tube. It would be best to get them to overlap. That’s because it will help to get a better signal.
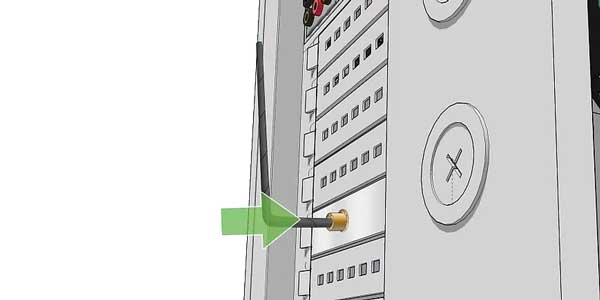
Step 10: Check
Now it’s time to check the reality. Turn on your router and connect your phone to Wi-Fi. See if you are getting any network bars or not. Try internet browsing for a couple of minutes.
If it works, then you are successful and can use the free internet!
Directional Antenna
You can also make a directional antenna with the proper tools and instructions to get the Wi-Fi running. Here’s how you should do it:
Step 1: Gather The Tools
First, you need to collect the materials for making a directional antenna. So gather an N-female chassis mount connector, an empty aluminum can, a pigtail pitch cable, 1 to ¼ inches copper wire, and four 6*1/4 nuts and bolts.
You would also need a screwdriver, soldering kit, and drill. The aluminum can should have a lid side at one end.
Step 2: Measure The Can
Can’s measurement is necessary to determine the connector’s placement. It must have 6 inches in length and 3 inches in width.
Step 3: Mark The Mounting
Now you need to measure the outside and bottom of the can and mark the mounting points. However, the measurement may vary according to the diameter of the can.
You should precisely measure and mark the mounting points to maximize the signal strength. Here are some standard measurements (diameter and height from the bottom) you need to look at:
- 3 and 3.74 inches
- 3.5 and 2.07 inches
- 6 and 1.38 inches
Step 4: Punch A Hole
It’s time to use the drill. Make holes precisely the size of the N-female connector. You must also make another four holes by taking the big one at the center.
Step 5: Measure Before Cutting The Wire
Line up the copper wire with the N-female connector using the metal connector. The wire length and little brass tube should total 1.21 inches while lining up. Try your best to maintain the measurements while drilling and lining up.
Step 6: Solder
After that, you need to use the soldering iron to attach the wire to the brass tube. It will create the probe. Make sure the wire is sticking straight out of the connector.
Step 7: Secure The Probe
Wait till the soldering cools down. Now you can mount the probe to the can using the screw connector and wire.
Step 8: Use The Pigtail Cable To Connect The Can
Insert the pigtail cable into the probe mount. And then, you should connect the other end of the line with a wireless card/antenna.
Step 9: Point The Can
You must point the can straight to the wireless access point. It will be easy if you use a zip tie and camera tripod for mounting.
Other Way To Access Free Internet
You can find some alternatives if it seems troublesome to make a new temporary antenna to access the internet.
First, you can ask your neighbors to give you the password only for a limited time. It’s the fastest way to get free internet. If you are not home, you can search for the nearest public Wi-Fi and get work done. But there would be risks of losing your data.
Your mobile phone might have some data plan left. You can also work on a mobile hotspot for some time. But making a router antenna will give a lot of coverage and speed than other alternatives. And it’s pretty to complete within a couple of minutes.
Bottom Line
We can’t even think of a day without the internet. As Wi-Fi gives up a higher data speed to browse, any problem with it can put us in trouble. Wi-Fi antennas can malfunction due to some specific reasons. But luckily, you can easily make a new temporary antenna and get your work done.
Hopefully, the discussion has taught you how to make a Wi-Fi antenna to get free internet using home appliances. You can also apply the directional antenna technique with all the tools. So, enjoy your browsing without any interference!


Comments 1